Setting up a Smart Home - Clipsal Wiser (i.e. Zigbee) + Homebridge (Siri) & Home Assistant
We’re renovating a house, and this includes replacing all of the electrics. Because of this, it’s now the time to automate a sensible amount of our house.
In this article / HOWTO / post, I describe how I set up my smart-home and provide code. I discuss Homebridge vs Home Assistant, and show how you can use Zigbee2MQTT and Mosquitto to provide the devices to either platform.
In our previous home, I used home assistant with a Raspberry Pi to automate a garage door via the GPIO pins and a relay. For this project, I’m going to run both Homebridge and Home Assistant, as there are pros and cons to both. You can run only one if you’d like, but keep in mind that:
- Homebridge is much easier to configure / use (can control automations via your phone), but…
- Home Assistant supports a few more devices (although probably much the same unless you have some oddball tech choices).
- Home Assistant is more powerful for automations.
As this page has grown beyond all reason, there is now a part 2: Updating Clipsal Wiser (Zigbee) without the hub. This second section covers FAQs about updating, the product in general, and more.
Summary: My thoughts on Clipsal Wiser / Schneider Electric’s Rebadged TuYa Products
If you’re reading this, you’re probably interested in deploying some of this into your house, so I want to put this up top on this page.
These are all just my opinion after using the system for a while. I still can’t think of a decent alternative style-wise, but I’d summarise the product as only worth: (aka 2⁄5 stars or a failing grade). You can work around a lot of the crappiness, but you shouldn’t need to.
The quality of the momentary switches is pretty awful. They’re mushy and don’t give a good push sensation. There’s no click when they’re triggered, so it takes quite a while to get used to them, and our guests often need to double-press because they didn’t get any feedback on how hard they pressed the first time. Style-wise, I still think they’re pretty, but I’ve got my eye on the Mercator Ikuü (maybe also TuYa? I don’t know), and I’ll possibly replace a bunch with these if they’re any good.
In summary, I’d describe it as a rather average product at a premium price. Unless the rest of your house uses Clipsal Iconic, I’d suggest looking elsewhere, even purely just because of the feel of the switches.
If you use their apps and hub, they also send your data to a Chinese company, including your location. Maybe if you’re a Medibank or Optus customer you now care about where your personal data goes? Up to you.
A note for Schneider Electric / Clipsal Wiser developers if you’re reading this - Please reach out and help. A lot of the problems are fixable (other than the mushy momentary switches). If all your Zigbee gear just worked correctly and had proper OTA updates, it should be a really good experience! (We then wouldn’t need to send data to random Chinese companies either).
UPDATE: There are now OTA updates in development branches, and these hopefully should within a month or so be available in production Zigbee2MQTT docker images. If you can wait this long, you will have a much easier path! See Updating Clipsal Wiser (Zigbee) without the hub for details.
Software Used
We’re planning on using:
 Homebridge - Provide access to all Zigbee and most third-party devices via
HomeKit/Siri.
Homebridge - Provide access to all Zigbee and most third-party devices via
HomeKit/Siri. Home Assistant - Provide access to any other device not supported by Home
Bridge (Home Assistant supports pretty much everything), and do complex
automation.
Home Assistant - Provide access to any other device not supported by Home
Bridge (Home Assistant supports pretty much everything), and do complex
automation. Mosquitto - An MQTT server that sends/receives commands (“turn on the living
room light”) and notifications (“the living room light has been switched on”).
Both Homebridge and Home Assistant subscribe to it so that they have the same
understanding of the current state of the house.
Mosquitto - An MQTT server that sends/receives commands (“turn on the living
room light”) and notifications (“the living room light has been switched on”).
Both Homebridge and Home Assistant subscribe to it so that they have the same
understanding of the current state of the house. Zigbee2MQTT - The translation layer between devices and Mosquitto. It speaks
to all Zigbee devices using a USB stick with a radio transceiver, and converts
these to/from MQTT messages that it sends/receives via Mosquitto.
Zigbee2MQTT - The translation layer between devices and Mosquitto. It speaks
to all Zigbee devices using a USB stick with a radio transceiver, and converts
these to/from MQTT messages that it sends/receives via Mosquitto.
Hardware Used
Note that none of these are affiliate links.
- Clipsal Wiser dimmers, switches, and relays.
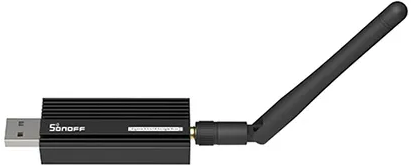
Conbee II USB Stick - ‘Hub’-equivalent to speak Zigbee radio protocol to the Wiser devices.- Sonoff ZBDongle-P - Note that I no longer recommend the Conbee (also note this is the -P not the -E). Once I got to 50+ devices the Conbee became unstable and kept losing connection to devices randomly. This has been rock-solid.
- Philips Hue Smart Plug - used for testing initial setup.

- QNAP TS-251+ NAS used to run Docker images via Portainer. You can use anything that supports
docker-composeto deploy this stack.
If you’ve got a QNAP but are still using that atrocious container station junk, follow this guide to
install Portainer CE. (Note that you may need to run something like export
PATH=$PATH:/share/CACHEDEV1_DATA/.qpkg/container-station/bin/ to add the docker
binaries to your path).
Also please note if you’re switching from a Conbee to a Sonoff ZBDongle-P, you
will need to update your QNAP to a very recent version to get the USB drivers.
You will also need to edit the Docker-compose file to mount /dev/ttyUSB0 (rather than
ttyACM0).
Finally, you can migrate from one Zigbee stick to another (even if Zigbee2MQTT doesn’t support it) using the instructions here (I suggest doing this on another computer).
Expected Technical Level for This Guide
- Experience with Docker.
- Reasonable understanding of networking.
If you’re not comfortable with Docker, I would suggest buying a Raspberry Pi and following one of the appropriate setup guides:
- Home Assistant - https://www.home-assistant.io/installation/raspberrypi
- Homebridge - https://github.com/homebridge/homebridge-raspbian-image/wiki/Getting-Started
If you’re not confident with either Docker or networking, I’d suggest considering HOOBS or a similar all-in-one product. You may run into some of the issues below. Hopefully with HOOBS you should be fine as it largely seems to be built on a lot of the software in this guide.
Why do this? - Problems with Home Automation in 2022
So there are a bunch of major issues with current smart home infrastructure:
- Numerous things that need an internet connection and an account (why should my vacuum cleaner need a username and password? Is everyone in this industry all collectively smoking crack?!)
- Expensive proprietary and non-upgradable solutions that rely on a wide range of apps being maintained indefinitely.
- Horribly insecure by design: why should your front door lock need to go from your phone, to an internet server maintained by someone, only then to go back to your front door?!
- None of the vendors work together. Who wants to have 20 different apps on your phone to control their house? Total nightmare.
That said, if you’re willing to accept the limited range of items, you can go CBus or Lutron or Control4 everywhere (at $30,000+) and solve these problems now while accepting that you’ll either need to pay a fortune to upgrade, or have a horribly outdated home in ten years.
The Problem with Clipsal (Schneider Electric) Wiser and Why I’m using it anyway
If you’re Australian, and wanting to
automate a home, you’ll get pretty (i.e. Iconic range) switches
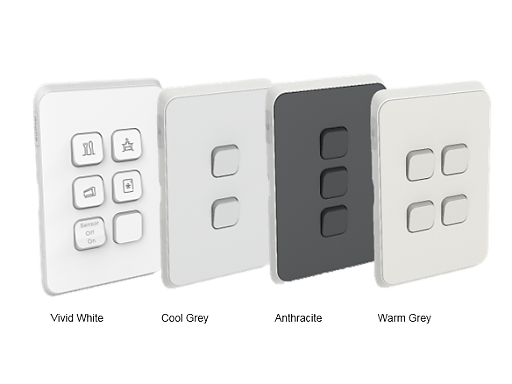 that fit into the rest of the dumb switches and powerpoints that you’ll have.
It supports Zigbee (as the standard under the hood – although this is not really advertised), so it’s
following a reasonable standard and isn’t WiFi.
that fit into the rest of the dumb switches and powerpoints that you’ll have.
It supports Zigbee (as the standard under the hood – although this is not really advertised), so it’s
following a reasonable standard and isn’t WiFi.
That said, it has a few issues:
- Clipsal try to restrict sales to sparkies (electricians). Anytime it’s hard to find a supplier for anything (unless you hold some magic status), it’s probably to allow for price gouging (after all, why restrict your addressable market?!). You can use SparkyDirect to give you an idea if your sparky is charging appropriately for supply (ours was great).
- Their hub is atrociously expensive (~$375 vs <$50 for Sonoff/Conbee/etc). Other hubs in this price range support numerous standards (e.g. Zigbee+ZWave+others).
- It relies on a Clipsal/Schneider electric app… and who knows what its future will be? There are at least two apps so far for some reason…
- It apparently (but unofficially) supports other Zigbee devices… sometimes?
- It doesn’t support anything else that’s non-Zigbee. No irrigation controller, no air-conditioning/HVAC, no Somfy blinds. Nobody else can add support for a third-party device.
- And… it STILL doesn’t support HomeKit / Siri despite years of promising.
This obviously makes the Clipsal Wiser Hub a no-go. But, because the Zigbee tech is still standards-compliant, we can use a third-party hub instead, and open-source software that actually provides sensible features.
The Problems with this solution
Everything, of course, has trade-offs. For this solution:
- You need to be OK that there’s nobody to call when it goes wrong.
- Technical experience with Docker or Raspberry Pi is required.
Hardware Setup - Part 1: The Controller
This is straight-forward:
- Plug the Sonoff ZBDongle-P into a USB port on your NAS, ideally with a 1m long USB-A to USB-A cable to improve the signal reception.
That’s literally it.
Software Setup - Part 1: Docker
Firstly, we need to configure docker. The repository is available here: https://github.com/rmcleay/home-automation/.
So at this stage you need to consider network security. I’m not overly fussed at this point as I can change IPs and lock it down later. You have essentially three options:
- Have an externally-managed VLAN routed to your NAS and place all of the docker containers on this network. Manage your ingress/egress control using a third-party router (e.g. Ubiquiti USG or similar).
- Expose services on your NAS behind another network and just map ports through to the host for services you need to access.
- Be really insecure and just dump all of these services onto your local network (not recommended as anyone could just inject MQTT messages).
I am doing the former as I’m happy managing networks like this. If you’re not, pick something else!
We want to deploy as much via docker as possible so that we don’t need to click around everywhere to get the basics working. Follow the steps below, including checking out the repository to obtain the docker-compose file. For reference, it looks like:
version: '3.8'

services:
  zigbee2mqtt:
    container_name: zigbee2mqtt
    image: koenkk/zigbee2mqtt
    restart: unless-stopped
    volumes:
      - /share/Container/homeautomation/zigbee2mqtt:/app/data
      - /share/Container/homeautomation/zigbee2mqtt/configuration.yaml:/app/configuration.yaml
      - /run/udev:/run/udev:ro
    # Uncomment if you're using network option #2.
    # ports:
      # - 8080:8080
    environment:
      - TZ=Australia/Sydney
    devices:
      # Make sure this matched your adapter location
      - /dev/ttyUSB0:/dev/ttyUSB0
    # Comment out if using network option #2
    networks:
      qnet-static-NETWORKNAME:
        ipv4_address: 10.0.0.103 # Change to suit your network specified below

  mqtt:
    image: eclipse-mosquitto
    container_name: mqtt
    restart: unless-stopped
    volumes:
      - /share/Container/homeautomation/mosquitto/config:/mosquitto/config
      - /share/Container/homeautomation/mosquitto/data:/mosquitto/data
      - /share/Container/homeautomation/mosquitto/log:/mosquitto/log
    # Comment out if using network option #2
    networks:
      qnet-static-NETWORKNAME:
        ipv4_address: 10.0.0.102 # Change to suit your network specified below

  homebridge:
    image: oznu/homebridge:ubuntu
    container_name: homebridge
    restart: unless-stopped
    environment:
      - HOMEBRIDGE_CONFIG_UI_PORT=8581
      - TZ=Australia/Sydney
    # Uncomment if you're using network option #2.
    #ports:
    #    - 8581:8581
    volumes:
      - /share/Container/homeautomation/homebridge:/homebridge
    # Comment out if using network option #2
    networks:
      qnet-static-NETWORKNAME:
        ipv4_address: 10.0.0.101 # Change to suit your network specified below

  homeassistant:
    container_name: homeassistant
    image: "ghcr.io/home-assistant/home-assistant:stable"
    # Uncomment if you're using network option #2.
    #ports:
    #    - 8123:8123
    volumes:
      - /share/Container/homeautomation/homeassistant/config:/config
      - /etc/localtime:/etc/localtime:ro
    restart: unless-stopped
    # Comment out if using network option #2
    networks:
      qnet-static-NETWORKNAME:
        ipv4_address: 10.0.0.100 # Change to suit your network specified below

# Comment out if using network option #2
networks:
  qnet-static-NETWORKNAME:
    external: true
Then
Checkout the repository from https://github.com/rmcleay/home-automation/ to get the docker-compose file and configuration files:
$ git checkout https://github.com/rmcleay/home-automation/Comment / uncomment blocks as required if you’re exposing ports on the NAS directly (option #2 above).
Replace
qnet-static-NETWORKNAMEwith the actual bridged network name that exists on your NAS.Change the specified IP addresses (if you’re doing option #1 or #3) to match your network configuration.
(Strongly recommended but optional) Add authentication to MQTT by uncommenting and editing the following files from the repository:
files/mosquitto/config/mosquitto.conffiles/zigbee2mqtt/configuration.yaml
(Optional) Either edit
files/zigbee2mqtt/configuration.yamlto setpermit_join: falseand need to turn on pairing mode later via the web interface, or leave it switched on for now, then switch it off via the web interface later.
Then to deploy on your local NAS:
- Put these updated config files into the appropriate directory on your NAS (in this case, /share/Container/homeautomation/) so that the volumes can be mapped through to the containers.
- Run docker-compose either via command line or by using the Portainer CE web interface (recommended).
- Wait for the images to download, and the containers to spin up.
N.B. If you don’t have Portainer CE running on your QNAP NAS, follow this guide to
install Portainer CE (note that you may need to run something like export
PATH=$PATH:/share/CACHEDEV1_DATA/.qpkg/container-station/bin/ to add the docker
binaries to your path).
Also note that at least some of the instructions you find online suggest privileged mode for Home Assistant. This is a stupid idea. Do not do this. If a plugin requires it, find a different plugin to use instead.
Once you’ve done this, you should have something that looks like this:

Unless you’ve misconfigured your username/password for MQTT, you should now have the working basics of a home automation setup.
Software Setup - Part 2: Configuring the web applications
Homebridge Configuration
So the next step is to make Homebridge understand MQTT messages, and then connect it to your phone. You can do this via the following steps:
- Login & create your account for Homebridge. If you’re using these IPs addresses, it can be reached at http://10.0.0.101:8581/
- Install homebridge-z2m. Browse to the plugins page, search for “z2m”, and install it as follows:
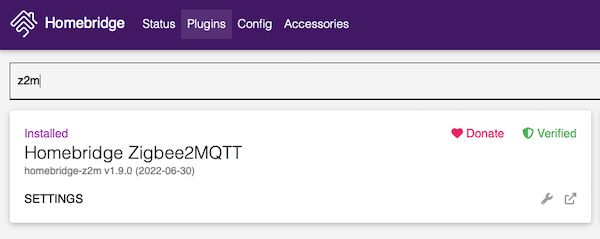
- You will be prompted for settings. Enter your username and password for MQTT
if you specified one above. You may also need to delete most of the blank
configuration to have it work. If you receive a configuration error, delete
all of the blank config blocks in the settings UI and try restarting again.
- Restart Homebridge via the power icon in the top left.
- Now add the bridge to HomeKit on your phone via the QR code in the top left of the main page of Homebridge as instructed.
- At this stage, you will be prompted to add the bridge, but no devices have yet been configured, so your phone will be tantalisingly blank for now…
Home Assistant Configuration
The main plan here is to use Home Assistant for complex automation. You may need to add it as another bridge to HomeKit on your phone, but we’re not going there yet. You’re not going to want two copies of every switch on your phone, but you will (later) selectively want to add things to HomeKit/Siri. For now, let’s get Home Assistant understanding what Zigbee devices you have.
- Login and create an account at (assuming IPs unchanged): http://10.0.0.100:8123/
- You don’t need to configure anything else that’s been auto-discovered yet, so just click on through.
- Click on Settings -> Devices and Services -> Add Integration (bottom right of screen).
Search for “mqtt” and select the following:
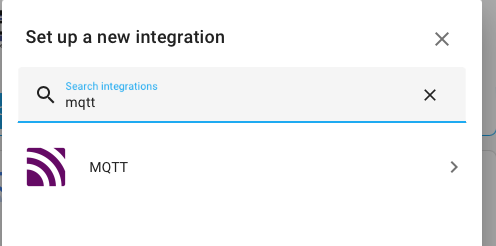
Enter the Username/Password for Mosquitto if you set one above:
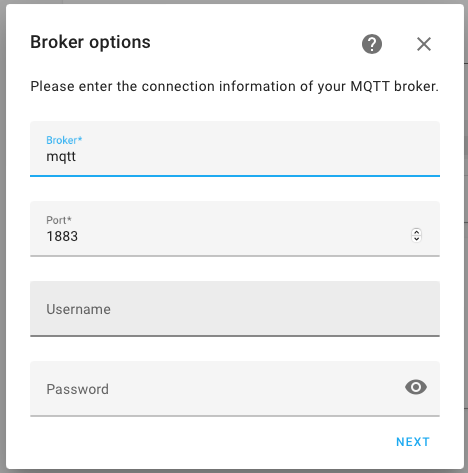
And done. Let’s add a device so that we can test it out.
Hardware Setup - Part 2: Adding a Device
I used a Philips Hue Smart Plug with a lamp plugged into it in order to test this out. Massively overpriced, but easily available. It comes with a quirk that you may need to download the app, join it via bluetooth and then delete it to have it available.
Steps:
- If you disabled permit join in your Zigbee2MQTT config, browse to http://10.0.0.103:8080/ and click on “Permit join (All)”.
- Unpack, plug in, and switch on the power to the Smart Plug.
- (May be required) If the Smart Plug doesn’t show up below, download the Philips Hue app, add the plug to it, then delete it.
- Hold down the button on the top of the Smart Plug until the indicator light flashes five times.
- (Optional) Give it a nice name via the Zigbee2MQTT UI at http://10.0.0.103:8080/.
That’s it. Literally it (unless you needed to join it to the app then delete it first).
Controlling & Accessing your device
You can now confirm that it is available and controllable across all of the following pieces of software. If you toggle it on/off in one, you can watch it update in the others automatically, and for Home Assistant, watch notifications be sent/received.
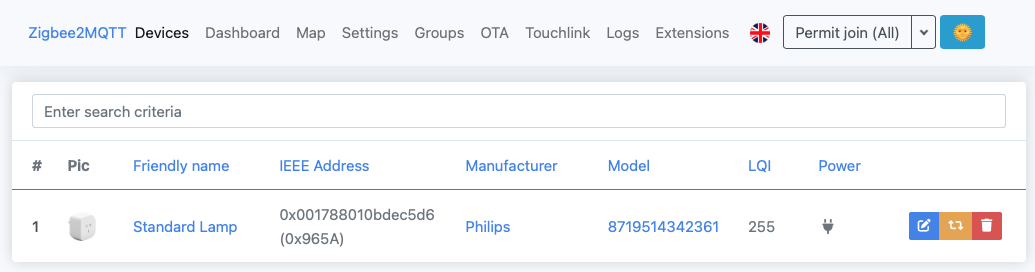
Zigbee2MQTT
Browse to https://10.0.0.103:8080/ and you should see:
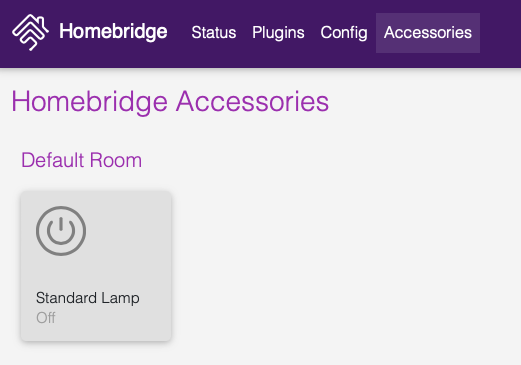
Homebridge
Browse to https://10.0.0.101:8185/, and then click on “Accessories” and you should see:
Home Assistant
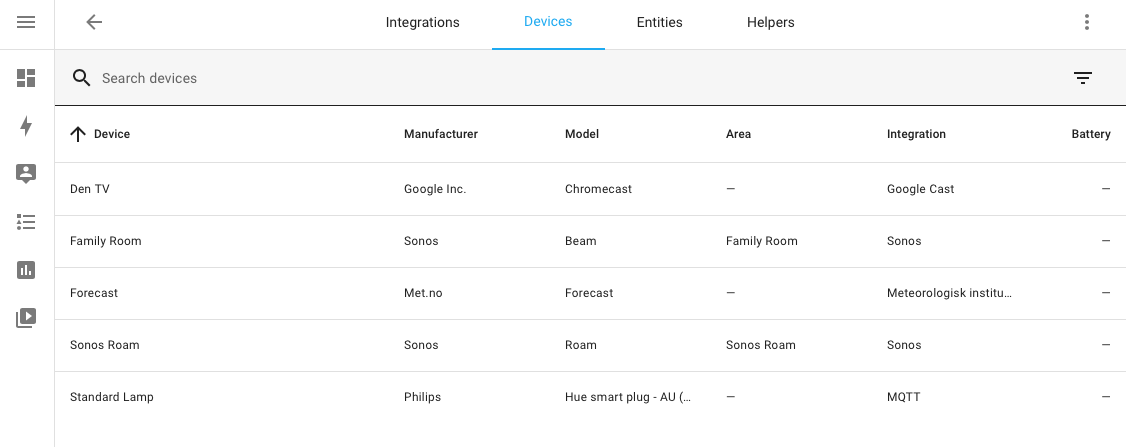
Browse to https://10.0.0.100:8123/, and then “Settings” -> “Devices and Scenes” -> “Devices” and you should see it, along with any other smart devices that were automatically provisioned:
HomeKit / Home App on your iPhone / Siri
Just open the Home app, and it should be there:

Try saying “Hey Siri, switch on the standard lamp”. This should now work fine.
If not, make sure that you didn’t miss the step of adding Homebridge to your phone.
How to Rename Devices Safely
There’s probably a way to make this work bi-directionally, but I found that if you rename all of your devices into Zigbee2MQTT (https://10.0.0.103:8080/), the names automatically propagate into both Home Assistant and Homebridge and there is no additional configuration required.
If you change names in Home Assistant or Homebridge, it won’t make its into any of the other software, and your device could potentially be known by multiple names (potentially quite confusing).
Automation - Two Options
So there are two options for automation covered here. There is a third option,
node-red, which is overkill for most people and well beyond the scope of this
article.
Homebridge / HomeKit-native Automation
Requirements: Either an Apple TV or HomePod connected to your home network.
This is by far the easiest way to automate something. Just use the Home app on your phone, or download the free Eve for HomeKit App for a better & more powerful experience than the standard Apple app.
You can then configure everything on your device.
Home Assistant
Requirements: Patience
This is by far the best and most powerful option of these two. E.g. By default,
you can use the value of sun.sun to determine the current elevation and decide
if you need to lower or raise blinds.
Rather than reinventing the wheel, I would suggest the following video:
- You can read more on Gio’s blog about automating in Home Assistant.
- Alternatively, read the offical Home Assistant documentation on automations. There are also blueprints (think cake-in-a-box automations) to discover as well.
Exporting Home Assistant Scenes to HomeKit
So, let’s make a pretty straight-forward scene via the UI, with the following settings:
Name: Lamp on Add Device: Standard Lamp, in the scene editor trigger to on.
We can then export this scene to HomeKit. We can do the same for automations (although these appear as switches instead), and scripts which perform more complex behaviour than scenes.
To export these to HomeKit, you can do:
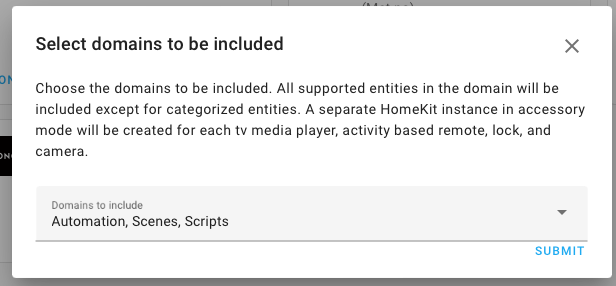
- Click on “Settings” -> “Devices & Services” -> “Configure” under HomeKit or “Add Integration” if not visible.
- Uncheck all of the boxes except “Automations”, “Scenes”, and “Scripts”. You
may only want scripts depending on how you configure your house, but you can
easily edit this later.
- Click on Notifications (Lower Left), and using your phone, use the QR code to add the Home Assistant Bridge to your phone.
Your scenes, automations, and scripts will appear on your phone, and are controllable from there.
Hardware Setup - Part 3: Adding Clipsal Wiser Devices
This is yet untested, but based on information from reddit, so probably more likely to be true than what your mother-in-law reads on Facebook. Thanks to the numerous posters in /r/homeautomation and /r/homeassistant!
Pairing a Wiser Device
- If you disabled permit join in your Zigbee2MQTT config, browse to http://10.0.0.103:8080/ and click on “Permit join (All)”.
- Make sure the Wiser device is installed and powered on.
- 3x short presses to enter pairing mode. If in Zigbee mode, it will blink amber. If not, switch to Zigbee mode with 12x short presses and try again.
- (Optional) Give it a nice name via the Zigbee2MQTT UI at http://10.0.0.103:8080/.
And that should be it. Good luck!
Other Useful Information on Wiser
Press Commands
So some of these are apparently not documented in the official Clipsal Wiser documentation:
- 10x short presses sets the backlight mode
- 3x short presses then hold it for ~10 secs, until, the red LED flashes slowly to factory reset (official docs).
- 12x short presses to switch from BLE and Zigbee. Wait for a restart.
- 3x short presses then press again and hold for ~15 seconds until the red LED flashes fast then keep holding until it flashes slowly to switch from Zigbee to BLE mode. Wait for a restart.
- 3x presses to enter pairing mode. If in Zigbee mode, it will blink amber.
Firmware Updates - Stop pushing buttons twice
There is some discussion on the internet that Clipsal/Schneider Electric failed to implement state correctly in early firmware versions of Wiser products. This requires an update if you don’t want to have to press a switch twice the first time after controlling something via a Zigbee command.
Because it would be crazy to spend nearly $400 on a hub to just do firmware updates, you can switch to Bluetooth mode and then update the firmware. Follow the instructions below under “Press Commands” to switch modes, and then use the Wiser Rooms app to update. (Why are there two apps anyway?!)
This bluetooth updating method does work contrary to some forum reports. I’ve done it on 20+ switches and confirmed it fixes the problem.
This now has a whole page:
Go here for more information.
Conclusions and Ending
And that’s the end of the beginning. From here, hopefully you have a reasonable understanding to get started with. For me, it’s been useful to document the steps I took so that in a few years when I’ve forgotten how I originally did it, I can come back to this article again.
Good luck!
